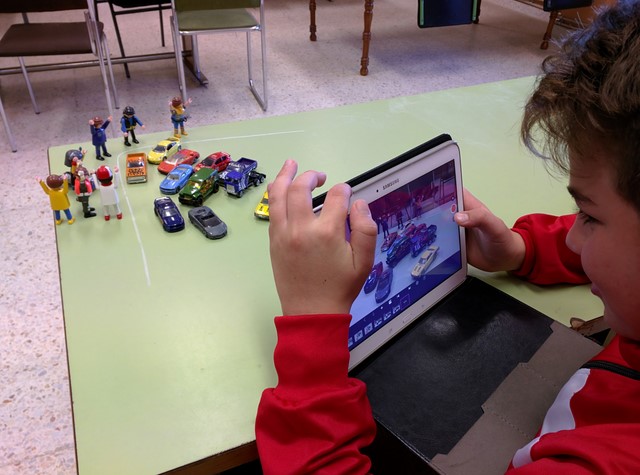
During the first term year 6A and 6B students learned about stop motion in films and created their first video in Arts & Crafts bilingual class. We published about this activity in our blog last month.
This term we have studied animals in both year 6's bilingual Science groups.
As a final activity Kids had to create a digital project (a poster or a presentation) using any digital tool they liked, so we practised the digital competence too. They have chosen Genial.ly, Prezi, Google Presentations and PicsArt.
Finally, they had to share their work on a collaborative wall on this Padlet.
It has been a rewarding experience. Students have been so motivated towards this final project that they have voluntarily decided to remain in the computers room during their break time in order to keep on working on their posters and presentations. Great work, children!
En el blog de Uveni he encontrado este interesante artículo a modo de guía para ayudar a padres con hijos adolescentes en la gestión del uso del teléfono móvil. Si bien nuestros niños de 5º y 6º aún no son adolescentes, no viene nada mal tenerlo en cuenta pues podemos aplicar muchos de estos consejos a su edad actual. El blog contiene otros artículos muy útiles para orientarnos en nuestra labor educativa así que aprovecho para recomendar su lectura regular.
According to Wikipedia, Stop motion is an animation technique that physically manipulates an object that appears to move on its own. The object is moved in small increments between individually photographed frames, creating the illusion of movement when the series of frames is played as a continuous sequence.
Shaun the Sheep Movie, Frankenweenie, Wallace & Gromit: The Curse of the Were-Rabbit or Chicken Run, are some examples of modern films using stop motion technique. We take pictures and we move the objects on the scene. Finally we play the pictures one after another and we get the feeling that the objects are moving. Here you are a classic movie filmed using the stop motion technique: The Lost World (1925)
What do we need?
We have used our tablets or smartphones cameras and software. For Android devices we used Stop Motion Studio. Thanks to this app you can take pictures and create the video. With this free version we cannot add music so we needed another app like VideoShow.
Extra material for our films have been: toys, plasticine, card, paper... almost any material we thought that could be very useful for our film making. We created characters and a scenary!
Steps we followed
In order to create our project we followed these steps:
1. Planning: we divided our class into groups of three or four students.
2. Designing: we agreed on the topic of our video, the characters and the script.
Writing the script
3. Creation: in this step we started working on our project; we created our characters and background, downloaded the apps and started taking pictures for our video.
Modelling our characters
Modelling our characters with plasticine
Creating the backgrounds
Time to start taking pictures!
We take picture after picture after picture to create our film
4. Edition: In this step of our project it is time to edit our video and add some music to it!
5. Promotion: Currently undergoing! We are uploading our films to online servers (YouTube, Vimeo...) sharing it with our classmates via our class blog, school website, etc.
We will soon hold our films premiere in class and analyse what we have learnt in this project, what we have done well and what we need to improve for the future.